Trimming a video is just a fancy way of saying you’re cutting out the fluff. You’re getting rid of the parts you don't need from the beginning, middle, or end of your clips. The fastest way to do this now? Use an AI-powered text-based editor. It turns your spoken words into text, so you can edit your video just like you'd edit a document—by deleting words.
Why Efficient Video Trimming Is a Game Changer
Learning how to properly trim your videos isn't just another box to check in your editing workflow. It's the absolute bedrock of creating content that people actually want to watch. Viewer attention is everything, and every single second of your video has to justify its existence. Nothing makes a viewer click away faster than raw, clunky footage. A tightly edited video, on the other hand, shows you're a pro who respects their time.
The problem is, nobody records perfect footage on the first try. Your raw files are going to be full of all the messy, human stuff that happens when you hit record. Those little imperfections might seem minor on their own, but they pile up fast and can make your video a real chore to watch.
Common Pain Points in Raw Footage
Let’s be honest, your raw footage probably has at least a few of these issues:
- Awkward Silences: Those long, dead-air pauses? They completely kill the pacing and make your video feel sluggish.
- Rambling Takes: It's so easy to go off on a tangent or take forever to make your point when you're in the flow of recording. Those tangents just water down your main message.
- Filler Words: We all use them. The "ums," "ahs," "likes," and "you knows" can become seriously distracting and make you sound less confident than you are.
- Mistakes and Retakes: Flubbing a line and starting over is just part of the process. But those false starts absolutely have to go in the final cut.
For years, fixing this stuff meant chaining yourself to your desk. You’d have to scrub through the timeline over and over, listening for every tiny mistake, and then painstakingly slice it out with a blade tool. It's not just boring work; it's a total creativity killer.
The real cost of slow editing isn't just the time you lose; it's the creative momentum that disappears with it. When you're bogged down in repetitive cuts, you have less energy to focus on the big picture.
The Shift to Smarter Editing
Thankfully, we're not stuck in the old ways anymore. Modern tools have completely flipped the script. AI-powered platforms like Gling can now handle the most mind-numbing parts of trimming for you. Instead of listening to your footage on a loop, you just read through a transcript and delete the words or sentences you don't want.
Even better, the AI can automatically find and cut out all those awkward silences and filler words, giving you a clean, tight first draft in a matter of minutes. This completely changes the game. It lets you skip the tedious cleanup and jump right into the fun, creative parts of editing—the storytelling.
Comparing the Three Core Video Trimming Methods
Deciding how to trim your video footage isn't a one-size-fits-all choice. Honestly, the best method really comes down to your project's needs, how tight your deadline is, and the level of precision you're after.
Let's break down the three main approaches creators are using today so you can pick the right tool for the job.
Traditional Timeline Trimming
This is the classic, hands-on way most of us learned to edit. In software like Adobe Premiere Pro or Final Cut Pro, you’re scrubbing through your video timeline, visually spotting the parts you don't want, and using a "blade" or "razor" tool to make cuts. You then select the junk clip, hit delete, and manually stitch the good parts back together.
This approach gives you absolute frame-by-frame control, which is fantastic when you're making creative cuts or need perfect visual timing. The biggest drawback? It's slow. Painfully slow. Manually hunting down every "um," awkward pause, or flubbed line in a long video can eat up hours of repetitive listening and clicking.
The real trade-off with manual trimming is time for control. It's essential for artistic edits, but it becomes a major bottleneck when you're just trying to clean up long-form content like an interview or a vlog.
Text-Based AI Trimming
A much, much faster way to work is text-based trimming, which completely changes how you interact with your footage. Instead of staring at a timeline, you're editing a document. It's a simple but brilliant shift in perspective.
Tools like Gling use AI to automatically transcribe your video's audio into text. To trim the video, you just read the transcript and delete the words or sentences you don't want. As you delete the text, Gling automatically snips out the corresponding video segment. This is ridiculously efficient because reading is up to four times faster than listening. For creators buried in talking-head videos, podcasts, or webinars, this method can slash the initial rough cut from hours down to minutes.
This chart really drives home how AI trimming helps you quickly identify and fix common recording mistakes.
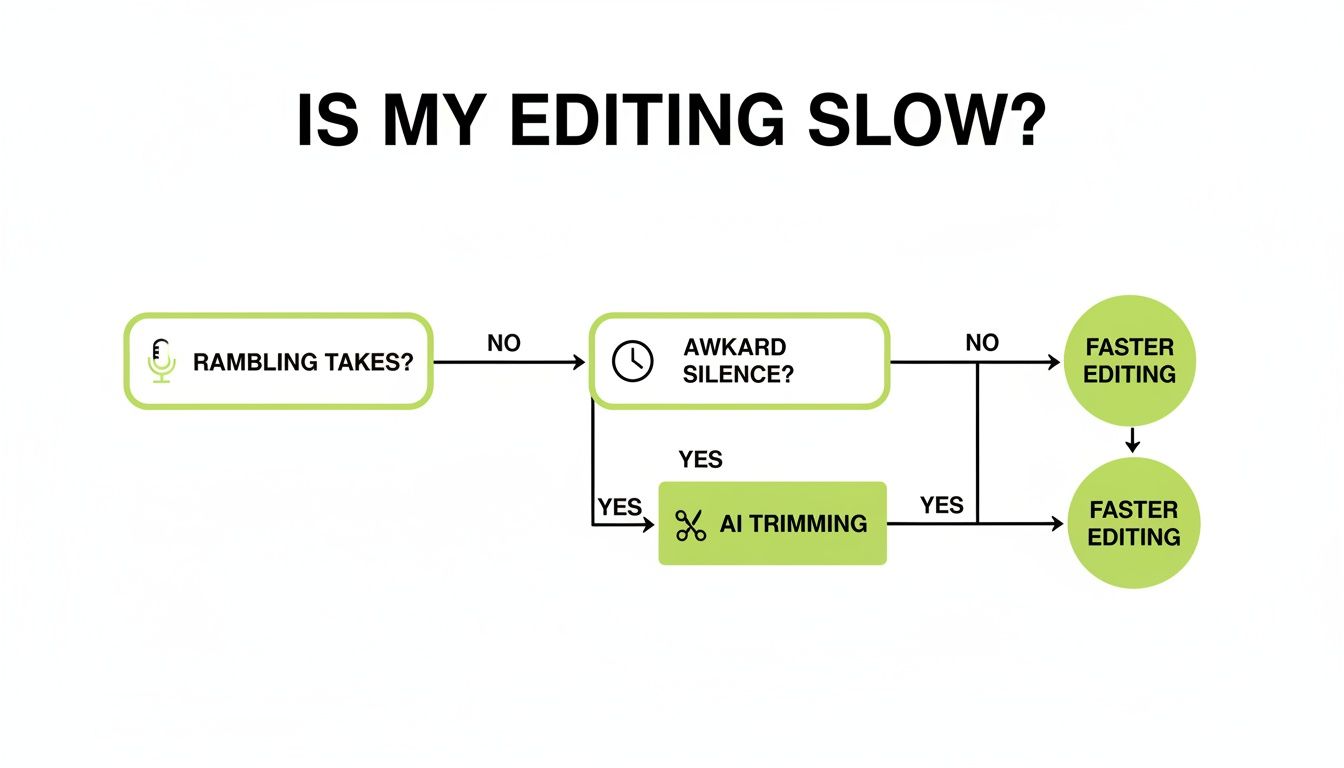
As you can see, the rambling takes and awkward silences that bog down the editing process are directly solved by an AI-powered workflow.
Automated Silence and Filler Removal
The third method is a specialized form of AI trimming that takes the cleanup process a step further by automating it. This is where an AI tool actively finds and removes specific imperfections for you, often without you having to lift a finger.
You can tell the tool to automatically detect and cut out things like:
- Long pauses that kill the pacing of your video.
- Filler words like "um," "ah," "like," and "you know."
- Bad takes or sections where you stumbled over your words.
Gling is a powerhouse here, highlighting these problem areas directly in the transcript so you can review and remove them with a single click. This approach gives you a clean, tight rough cut almost instantly, freeing you up to focus on the fun stuff—storytelling and creative edits.
And for those specifically looking to repurpose existing online content, learning how to take clips from YouTube videos often involves similar cleanup steps to get them ready for other platforms.
Video Trimming Methods Compared
To make the choice easier, here’s a quick rundown of how these three methods stack up against each other.
Ultimately, the goal is to find the workflow that saves you the most time without sacrificing the quality of your final video. For many creators, a hybrid approach—using AI for the initial heavy lifting and traditional tools for the final polish—is the sweet spot.
Using AI to Edit Video Like a Document
What if you could edit a two-hour recording just by striking through words in a document? This isn't some far-off concept; it’s how modern video trimming works, and it completely changes the game. Forget scrubbing through timelines for hours. Text-based editing lets you focus on your story and make cuts intuitively.
The whole process is surprisingly simple. You just upload your raw video file to an AI tool like Gling. From there, the AI transcribes every single word, turning your long video into an editable script that’s ready for you to shape.
Making Cuts by Deleting Text
Once you have the transcript, trimming your footage feels just like using a word processor. Did you ramble for a few sentences before finally getting to the point? Just highlight that chunk of text and hit delete. Instantly, the corresponding video segment is gone, leaving you with a clean, tight cut.
Think about a real-world scenario. You're editing a podcast interview, and the guest goes on a five-minute tangent that has nothing to do with the episode's topic. Instead of painstakingly trying to find the in and out points on a waveform, you can just scan the transcript, find the off-topic section, and zap it with a couple of clicks. It's not only faster, but it also gives you a much clearer view of your content's structure.
Here’s what that looks like inside Gling. The video’s dialogue is laid out as a transcript you can edit directly.
See how the text is already broken down into manageable chunks? This makes it incredibly easy to spot the parts you don't want and get rid of them.
The first step in this workflow is to transcribe video to text, which essentially turns your visual media into an editable document. This is the foundation that makes the entire AI-powered process possible.
Automatically Removing Fluff and Pauses
But here's where it gets really good. The AI can automate most of the tedious cleanup for you. Tools like Gling are built to intelligently find and flag all the little things that kill your pacing and make viewers click away. This includes:
- Filler Words: It highlights every single "um," "ah," and "you know," letting you review and delete them all at once.
- Long Silences: Those awkward pauses are automatically detected so you can tighten up the edit for a much more professional feel.
- Bad Takes: Gling can even spot where you stumbled over words and immediately re-recorded, making it easy to keep only the good take.
This automated first pass gives you a clean rough cut in minutes—a job that used to take me hours of manual, mind-numbing work. If you’re curious, you can learn more about how Gling's text-based editor saves time for creators by taking care of these repetitive tasks.
This shift toward AI-powered editing is a huge trend in our industry. It’s all about letting creators get away from the tedious technical stuff so they can spend more time on what actually matters: telling a great story.
This technology is growing for a reason. The video editing software market ballooned from $2.24 billion in 2018 to $3.09 billion in 2023, and it's projected to hit $5.13 billion by 2032. That growth is being driven by the explosion of content on YouTube and TikTok, where fast, engaging cuts are everything. It’s no surprise that 63% of video marketers are now using AI in their editing, using text-based tools to cut the fluff and keep up with demand.
Practical Trimming Workflows for Creators
Knowing how to trim a video is one thing, but knowing the smartest way to do it for your specific content is what really separates the pros from the rest. Let's move past the theory and dive into some real-world workflows you can put into practice today.

Workflow for YouTube Creators
If you’re a YouTuber, especially in the talking-head, vlogging, or review space, your raw footage is probably packed with retakes, long pauses, and those classic "uhms" and "ahs." The goal here is speed and momentum. You need to get to the good stuff—fast.
A text-based trimming workflow is a game-changer for this. Instead of endlessly scrubbing through a timeline, you can get an AI transcript and just read through your video. Here’s a typical approach:
- Kill the Fluff First: Start by deleting all the obvious mistakes and filler words. This is your first and fastest pass. With a single click in a tool like Gling, you can eliminate every "um," "ah," and long silence in seconds. This initial cleanup can easily cut your footage length by 10–20% before you’ve even made a creative decision.
- Trim for Pace and Retention: Read through the remaining transcript and get rid of anything that feels slow or repetitive. Ask yourself, "Does this sentence really need to be here?" Tighten up your points and avoid the dreaded wall of text at all costs. This keeps your audience hooked.
- Isolate Social Media Clips: After your main edit, scan the transcript for punchy quotes or key takeaways. Highlight these sections to instantly create dozens of potential short-form video clips for TikTok, Reels, or Shorts.
Workflow for Podcasters
For podcasters, it's all about the listening experience. Audio quality and conversational flow are everything. A clunky, pause-filled recording can make listeners tune out in a heartbeat. The goal is to make it sound seamless and natural.
Your main job is cleaning up the conversation. I recommend getting a transcript with an AI tool like Gling, then focusing your energy on removing those awkward pauses between speakers and any stumbles that kill the rhythm. Trust me, it's far easier and more intuitive than squinting at an audio waveform trying to spot imperfections.
A clean audio edit isn't just about removing mistakes; it's about respecting the listener's time and attention. By trimming the fat, you make your content more engaging and professional.
Workflow for Marketers and Educators
Creating content like webinars, online courses, or product tutorials? Your biggest challenge is taking a mountain of information and making it digestible. People rarely have an hour to watch a full recording, but they'll almost always watch a five-minute summary of the highlights.
Your workflow should be all about finding and extracting the most valuable nuggets. Upload your long-form recording and use the transcript to pinpoint the core concepts. Then, be ruthless. Delete everything else—the long-winded intros, the off-topic Q&A, and any explanations you repeated. This lets you quickly turn a one-hour webinar into a series of concise micro-learning videos, perfect for sharing on social media or in an email newsletter.
Integrating with Professional Editors
No matter which workflow you choose, an AI-powered first pass doesn't have to be the final step. One of the most powerful strategies I've seen is using a tool like Gling for the initial, soul-crushing cleanup, then exporting the project to a traditional editor for the final creative polish.
For instance, you can do your rough cut in Gling, which might take you only 15-20 minutes for an hour of footage. From there, export an XML file and drop it right into Adobe Premiere Pro or DaVinci Resolve. This hands off a project where all the silences and bad takes are already gone, letting you jump straight into the fun stuff like color grading, adding graphics, and fine-tuning the creative edits. You can learn more about mastering AI video editing to remove unwanted clips and silences to get the most out of this process. This hybrid approach gives you the best of both worlds: AI speed and human creativity.
Getting Your Trimmed Video Out the Door: Export Settings

You’ve spent all this time slicing and dicing your footage to perfection. The last thing you want is to ruin all that hard work with the wrong export settings. This final step is what determines whether your video looks crisp and professional or like a blurry, pixelated mess when it gets out into the world.
Don't let the technical jargon throw you off. The goal is simple: keep the quality high without ending up with a gigantic file that takes forever to upload. Think of it as putting your video in the right box for shipping—it needs to arrive looking just as good as it did when it left your timeline.
Nailing the Right Export Settings
For almost any online platform you can think of, a handful of standard settings will get the job done beautifully. Instead of getting lost in a sea of options, just focus on these key pillars for a solid export every single time.
- Resolution: Always try to match your export resolution to what you recorded in. If you shot in 4K, export in 4K. It's okay to downscale to 1080p if you need a smaller file, but never, ever upscale. Pushing a 1080p video to 4K will just make it look blocky and soft.
- Codec: H.264 (AVC) is the undisputed king here. It gives you a fantastic balance of high quality and manageable file size, and it’s what YouTube, Instagram, and pretty much every other platform prefer.
- Bitrate: This is a big one. For a standard 1080p video, a bitrate between 8-12 Mbps is your sweet spot. If you're working with 4K, you'll want to bump that up to 35-45 Mbps. A higher bitrate means more data, which translates to better quality but also a larger file.
- Frame Rate: Keep it simple—export at the same frame rate you recorded in. Whether it's 24, 30, or 60 FPS, consistency is key to avoiding choppy, weird-looking motion.
The most common mistake I see is exporting with a bitrate that’s too low. That’s what causes that ugly, compressed look, especially in scenes with a lot of movement. If you're not sure, it's always better to aim a little higher on the bitrate to keep all that detail you worked hard to capture.
The Final Polish
Beyond the core technical specs, a couple of finishing touches can really make your video stand out and feel more complete.
One of the most important additions is captions. Tools like Gling can automatically generate an SRT caption file for you right when you export. This is a huge deal for accessibility, and it’s a lifesaver for the massive number of people who watch videos on social media with the sound off.
Another clever feature to look for is auto-framing. This function dynamically crops and pans to keep you perfectly centered in the shot, almost like you had a dedicated camera operator. It gives your video a polished, professional feel without any extra effort on your part.
The need for tools that can do this quickly is only growing. The video editor market was valued at USD 1,009.66 million in 2026 and is expected to hit USD 1,449.55 million by 2035. This boom is driven by creators who need to pump out great content fast, which is why 63% of editors now use AI to keep up, as noted by Industry Research.biz.
If YouTube is your final destination, the file container matters, too. For a deeper dive, check out our guide on the best video format for YouTube to make sure you’re giving the algorithm exactly what it wants.
Got Questions About Trimming Videos? Let's Clear Things Up.
As you get deeper into video editing, you start running into the same questions over and over. Everyone's looking for that perfect, efficient workflow. Here are my straightforward answers to some of the most common things creators ask about trimming their footage.
What's the Absolute Fastest Way to Trim a Long Video?
If you're dealing with anything over 15 minutes of raw footage—think podcasts, interviews, or long YouTube takes—text-based editing with an AI tool is the clear winner. It’s not even a fair fight.
Instead of sitting there, eyes glued to the timeline, scrubbing back and forth, you just get a transcript. You read through it, find the parts you don't want, and delete the text. Poof. The video is cut. You can read way faster than you can listen, so a tedious hour-long job can literally be done in a few minutes.
How Can I Trim a Video Without Ruining the Quality?
Good news: the act of trimming itself doesn't touch your video's quality. Where you can get into trouble is during the export process. If you use the wrong settings, you’ll end up with a compressed, pixelated mess.
The trick is to export with a bitrate and resolution that match your original files. Shot in 4K? Export in 4K.
Pro Tip: My go-to workflow is to use a tool like Gling for the initial rough cut, then export an XML file to a professional editor like Adobe Premiere Pro. This way, the final render is done using your original, full-quality source files, and you don't lose a single pixel of detail.
Is AI Really Better at Trimming Videos Than a Person?
Here's the deal: AI is a machine. It's fantastic at the boring, repetitive stuff, while we humans are still the champions of creative judgment.
An AI is unbeatable at zapping every single silence, filler word ("um," "ah," you know the drill), and blatant retake from your timeline with perfect accuracy. This is where you’ll save a mind-boggling amount of time.
But a human editor is still crucial for the stuff that requires feel—like holding a pause for comedic timing or picking the take that had the most authentic emotional delivery. The best workflow isn't AI vs. human; it's AI and human. Let the AI do the heavy lifting and cleanup, which frees you up to focus on what really matters: telling a great story.
Ready to stop wasting hours on tedious cleanup? Gling uses AI to remove silences and bad takes automatically, letting you edit your videos by simply editing text. Cut your editing time in half and get back to creating. Try it for free at gling.ai.
Prepared with Outrank app