How to Remove Background Noise from Video for Flawless Audio

The best way to remove background noise from video is with a two-pronged attack: smart recording techniques on the front end and powerful software in post-production. While you can get deep in the weeds with manual controls in traditional video editors, modern AI tools like Gling’s Voice Enhancer can often clean up your audio with a single click.
Your Essential Guide to Flawless Video Audio
We live in a world overflowing with video content, which means crystal-clear audio isn't just a nice-to-have—it's table stakes. Think about it: what’s the fastest way to make you click away from a video? Bad sound.
Distracting background noise, whether it's a humming air conditioner, distant traffic, or a subtle hiss from your gear, can completely undermine your message. It makes you harder to understand and, frankly, can come across as unprofessional. This guide is your complete workflow for getting that clean, crisp audio your content deserves. We'll cover everything from identifying the specific type of noise you're dealing with to using the right tools—both automated and manual—to eliminate it for good.

This setup is what we're all aiming for. The more you can control your recording environment from the start, the less cleanup you’ll have to do later. An ounce of prevention is truly worth a pound of cure when it comes to audio.
Why Clean Audio Matters More Than Ever
The push for better sound isn't just in our heads; it's driving serious innovation. The market for background noise reduction software is booming, jumping from USD 2.31 billion to an estimated USD 3.21 billion in just a year. This isn't just about corporate conference calls. It’s driven by the massive demand from content creators who need to stand out.
As video production quality gets better and better, the ability to remove background noise from video has become a non-negotiable step in the editing process.
Key Takeaway: Clean audio isn’t a luxury reserved for the biggest creators anymore. It’s a basic requirement for keeping your audience hooked. Viewers will forgive a slightly shaky camera, but they won't stick around for bad sound.
What You Will Learn
My goal here is to give you practical, actionable advice, not just a bunch of theory. By the time you're done reading, you'll have the confidence to tackle pretty much any audio problem that comes your way.
Here’s what we’ll cover:
- Diagnosing the Problem: How to tell the difference between a 60-cycle hum, a high-frequency hiss, and random room noise.
- Prevention First: Simple tricks you can use on location to capture cleaner audio from the get-go.
- The AI Advantage: A look at how tools like Gling can do the heavy lifting for you, saving hours of work.
- Getting Your Hands Dirty: When and how to use manual tools like EQ, noise gates, and spectral repair for precise fixes.
If you’re looking for a broader overview of audio production, this guide on how to improve audio quality and sound like a pro is a fantastic resource. For now, let’s dive into the specifics of banishing background noise for good.
First Things First: Diagnose Your Audio Problems
Trying to fix audio issues without first figuring out what’s wrong is a recipe for frustration. It’s like trying to fix a car engine by randomly tightening bolts—you might get lucky, but you’ll probably just make things worse. Before you even touch a filter or an AI tool to remove background noise from your video, you need to play detective.
This diagnostic phase is hands-down the most important step for getting clean, professional-sounding audio. It means listening carefully—and I mean with good headphones, not just your laptop speakers—to pinpoint the exact kind of noise you're up against. Is it a constant drone, or something that pops up out of nowhere?
Nailing this at the start saves you from hours of headaches. If you apply the wrong fix, you can create strange, unnatural sounds (what we call "artifacts") that are often much harder to remove than the original noise itself.
Constant Hum vs. Sudden Interruptions
Most of the noise you'll encounter will fit into one of two buckets: constant or intermittent. Knowing which one you’re dealing with is the first critical distinction because each requires a completely different strategy.
Constant noise is that steady, predictable sound humming along through your entire recording. It's the kind of background drone your brain naturally filters out in real life, but your microphone will capture it in painful detail. Think of it as the sonic wallpaper you didn't ask for.
A few classic examples:
- The low-frequency hum of an air conditioner or refrigerator.
- The high-pitched hiss from a cheap microphone preamp that's been cranked up too high.
- The general room tone of your space—that subtle ambience that exists even in the "quietest" of rooms.
Intermittent noise, on the other hand, is the unpredictable stuff. These are the sudden, sharp sounds that can yank a viewer right out of your content. They're usually louder and more jarring than constant noise, making them especially distracting.
The usual suspects include:
- A dog barking in the other room.
- A siren wailing past your window.
- That notification ping from the phone you swore you silenced.
- An unexpected cough or the squeak of your chair.
My Go-To Tip: Always, always record 10-15 seconds of "silence" at the beginning of every session. This captures the pure room tone. This little snippet becomes a powerful "noise print" that many plugins can use to precisely target and eliminate constant hum and hiss later in the edit. It's a lifesaver.
Using Your Ears and Your Eyes
Once your footage is loaded into your editor, you can diagnose the problem using both your ears and the visual information in the audio waveform. The waveform gives you visual clues that confirm what you're hearing, helping you zero in on the problem.
Before you even start thinking about solutions, it's helpful to be able to identify exactly what you're up against. Here’s a quick reference guide to the most common culprits.
Common Types of Background Noise and Their Characteristics
Being able to look at your audio's frequency spectrum and immediately recognize a thick, solid band at the bottom as a 60-cycle hum (in North America) is a game-changer. You'll see high-frequency hiss as a sort of fuzzy static layered across the top. And those intermittent noises? A door slam or a loud clap will jump out as a massive, sharp spike in the waveform.
Understanding these differences is everything. That constant hum can often be surgically removed with a simple EQ, but that sudden dog bark might need a more advanced tool like spectral repair to essentially "paint" it out of existence without mangling your voice. This initial analysis is the foundation of your entire audio cleanup strategy.
The Power of Prevention: Getting Clean Audio at the Source
Let's be honest: the best way to remove background noise from video is to prevent it from getting into your recording in the first place. Post-production tools are miracle workers these days, but they’re not magic. Pushing noise reduction too hard can leave your voice sounding thin, watery, or robotic. Starting with the cleanest possible audio isn't just a "best practice"—it's the foundation of professional-sounding content.
Think of it like trying to edit a blurry photo. You can sharpen it, but you can never truly restore the original detail. Once a loud air conditioner hum is baked into the same track as your voice, separating them perfectly is next to impossible. Getting it right at the source will save you hours of frustration in the edit and give you a far superior final product.
Choose Your Battlefield Wisely
Your recording environment is the single biggest variable in your audio quality. A room with bare walls, hardwood floors, and big windows is an echo chamber. Sound waves bounce off these hard surfaces, creating the reverb and echo that instantly screams "amateur recording."
The goal is to find or create a space with soft, irregular surfaces that absorb sound instead of reflecting it. You don't need to build a professional studio.
- Soften the room: Drape some heavy blankets over doors or toss a thick rug on the floor. Even a couch and some throw pillows can work wonders to deaden those reflections.
- Think small: A walk-in closet is a content creator's secret weapon. All those clothes act as fantastic, free sound absorption.
- Hunt for hidden noises: Before you hit record, just be quiet for a minute. What do you hear? The low hum of a computer fan? The buzz of a refrigerator in the other room? Turn off everything you can—air conditioners, fans, and yes, even your fridge for the 20 minutes you're recording.
A quick tip from my own experience: The low-frequency rumble from a refrigerator is a nightmare to remove cleanly. It often sits in the same frequency range as the human voice, so trying to EQ it out can make you sound thin and weak. Unplugging it for a short time is a simple fix for a major post-production headache.
This basic process—listen, identify the specific noise, and then choose a way to deal with it—is the core of getting great sound.
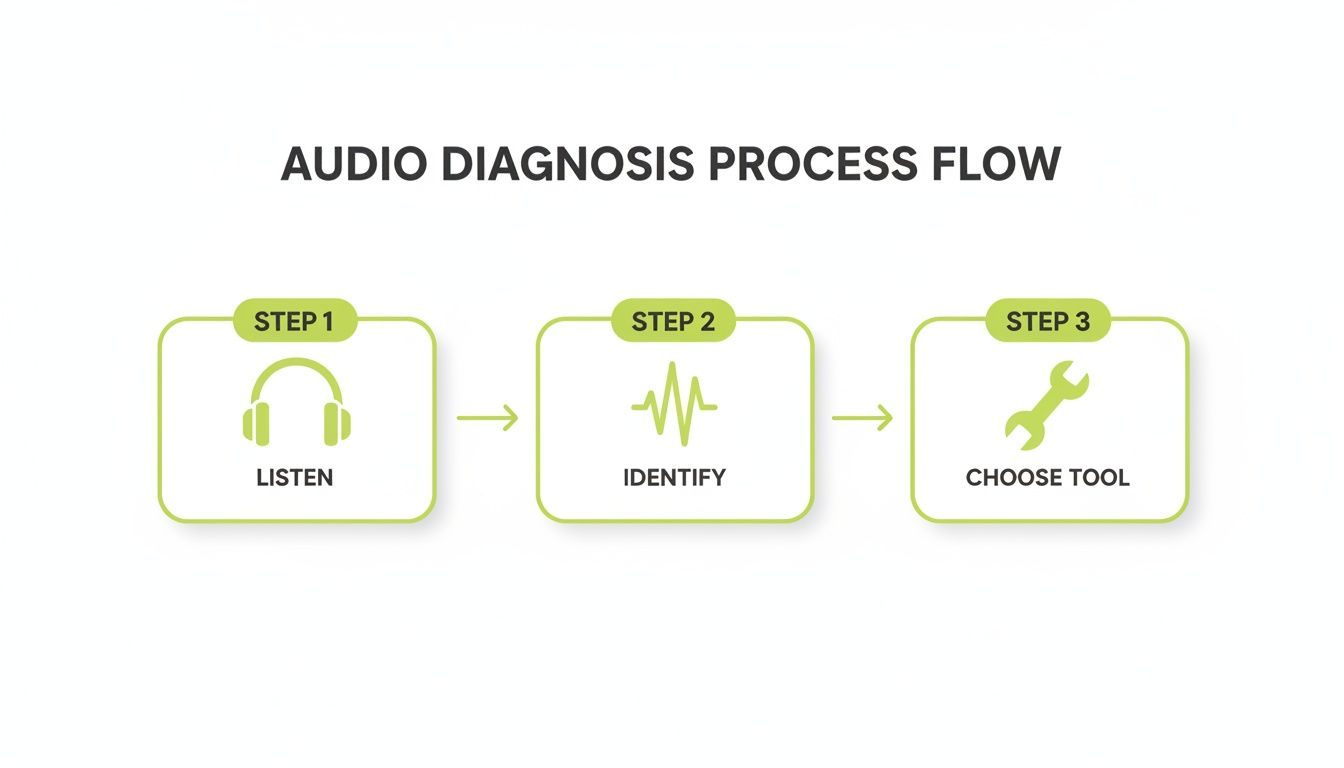
This workflow highlights that you can't just throw a filter at a problem; you have to know what you're fixing first.
Your Microphone Matters More Than Your Camera
You could be filming on an $8,000 cinema camera, but if you’re using its tiny onboard microphone, your audio will let you down. The mic built into your camera is designed to pick up everything, from every direction. That's the exact opposite of what you need for clean dialogue.
Investing in a decent external microphone is the single biggest upgrade you can make to your production value.
The whole game is about getting the mic as close to your mouth as possible. This dramatically improves your signal-to-noise ratio—the loudness of your voice compared to the loudness of the background noise.
- Lavalier (Lapel) Mics: These little mics clip right onto your shirt, just inches from the source. They're fantastic for isolating your voice and killing room echo.
- Shotgun Mics: These are super directional, meaning they hear what they're pointed at and reject sound from the sides and back. Mount one just out of frame, aimed at your chest, and it'll do a great job of ignoring distracting noises.
Set Your Levels for Success
The final piece of the puzzle is setting your recording levels correctly, a process often called gain staging. If your microphone's sensitivity (gain) is too low, you'll have to crank the volume later, which also cranks up the subtle electronic hiss from your gear. That’s your noise floor.
But if you set it too high, your audio will "clip" and distort—a harsh, crackly sound that is completely unfixable. The sweet spot is to have your voice peaking between -12dB and -6dB on your audio meter. This gives you a strong, clean signal well above the noise floor, with plenty of headroom to avoid any nasty distortion.
For a deeper dive, check out our guide on improving audio quality in your videos.
Using AI for a Fast, Effortless Fix
While manual audio cleanup has its place, let’s be real—for most creators, speed is the name of the game. This is where AI tools have stepped in and completely changed the workflow, turning a once-tedious, technical chore into something you can knock out with a single click.
These aren't just blunt instruments applying a generic filter. Modern AI systems have been trained on thousands of hours of audio, learning to tell the difference between a human voice and all the junk you don't want—the fan hum, the street traffic, the annoying room echo. They intelligently suppress those distractions while leaving the natural tone and clarity of your voice intact. For anyone trying to produce content consistently, that efficiency is gold.
The One-Click Revolution
Picture this: you nail the perfect take, but halfway through, your neighbor’s ancient air conditioner roars to life. In the old days, you’d be stuck opening a complex plugin, trying to isolate the right frequency with an EQ, or sampling a "noise print" and hoping for the best. It was a gamble that often left your voice sounding thin, watery, or full of weird digital artifacts.
Now, tools like Gling's voice enhancer do the heavy lifting for you. You just flip a switch. The AI scans your audio, figures out what’s you and what’s noise, and cleans it up. It’s all about finding that sweet spot where the distractions are gone, but your dialogue still sounds like you.
This isn’t just a niche convenience; it’s a huge shift in the industry. The market for these tools is exploding, expected to jump from USD 608 million to USD 961 million by 2032. That growth is all thanks to AI getting incredibly good at this, now reaching up to 95% accuracy in separating speech from noise. It’s making professional results accessible to literally everyone.
More Than Just Noise Removal: Editing with Text
What makes this new wave of tools so powerful is how they weave audio cleanup right into the editing process. Gling, for example, pairs its Voice Enhancer with a text-based video editor. After transcribing your recording, it lets you edit your video just by editing the transcript.
This completely changes how you can remove background noise from video, especially for those sudden, random sounds.
- Did you cough mid-sentence? Just find the word in the transcript and delete it. Gling automatically snips out the corresponding audio and video.
- A dog barked loudly? Highlight that part of the text and it’s gone.
- Fumbled a word or two? A quick backspace cleans up the take instantly.
This approach is just so much more intuitive. You’re no longer squinting at a waveform, trying to find a tiny audio spike. You’re just reading and refining your message, and the audio issues vanish along with the words you don't want.
For creators, this is a massive win. You can finally stop obsessing over technical audio fixes and stay focused on the story. The AI handles the cleanup, so you can handle the creativity.
Why This Is a Game-Changer for Creators
The biggest advantage here is the sheer amount of time you get back. Manually denoising, de-reverbing, and EQing a single audio track, especially for a long podcast or tutorial, can easily eat up an hour or more. AI tools shrink that down to seconds.
This efficiency levels the playing field. You no longer need to be a certified audio engineer or sink a ton of money into complicated software to sound good. With a tool built for creators, you get broadcast-quality sound without the brutal learning curve, letting you get back to what you actually love doing: making great content.
Manual Audio Cleanup Techniques for Ultimate Control
AI tools are fantastic for speed and simplicity, but sometimes you need a surgeon's touch. For those really tricky audio issues, or when you just want total command over the final sound, rolling up your sleeves and using manual cleanup techniques is the way to go. This is the world of professional audio engineers and seasoned video editors working inside Digital Audio Workstations (DAWs) or advanced editors like Adobe Premiere Pro and DaVinci Resolve.
Stepping into the manual realm lets you tackle noise with a level of detail that one-click solutions can sometimes miss. It's all about getting in the driver's seat and making precise, targeted adjustments instead of letting an algorithm call all the shots. To do this well, you'll need to master video editing software for beginners, as these platforms house the powerful tools needed to truly refine your audio.
This kind of detailed work isn't niche anymore. The market for background sound removal software was valued at USD 320 million and is on track to more than double, hitting USD 780 million by 2032. This surge shows a huge demand for both automated and manual tools across filmmaking, podcasting, and content creation, making pro-level audio accessible to everyone. You can dig deeper into these trends with insights from HTF Market Insights.
Using a Noise Reduction Plugin
The most common tool in the manual arsenal is a dedicated Noise Reduction plugin. Unlike an AI enhancer that analyzes everything at once, this tool is much more specific. It works by "learning" a sample of the exact noise you want to remove.
The process itself is both straightforward and incredibly powerful:
- Capture a Noise Print: First, you find and highlight a few seconds of pure background noise in your recording—that room tone you hopefully recorded at the beginning.
- Analyze the Noise: The plugin then analyzes the unique frequency fingerprint of that specific hum, hiss, or buzz.
- Apply Reduction: It scans your entire audio track and carefully subtracts that noise fingerprint from your dialogue, leaving your voice mostly untouched.
A word of caution: the key is to be subtle. If you push the reduction setting too high, you can get that dreaded "underwater" or robotic sound. A little bit of natural room tone is often better than a sterile, dead silence. For a detailed walkthrough, check out our guide on how to https://www.gling.ai/blog/how-to-remove-noise-from-video-using-adobe-premiere-pro.
Surgical Fixes with an Equalizer (EQ)
Think of an Equalizer (EQ) as a scalpel for sound frequencies. It lets you boost or cut very specific frequency ranges with surgical precision. While it’s not the right tool for complex, broadband noise like a crowd murmur, it’s an absolute lifesaver for constant, single-frequency problems.
Here's a classic example: You notice a persistent electrical hum throughout your recording. By pulling up an EQ with a frequency analyzer, you spot a sharp spike at exactly 60 Hz (or 50 Hz in many parts of the world). You can apply a super-narrow "notch filter" to cut that exact frequency, instantly killing the hum without affecting your voice in any noticeable way.
This technique is a game-changer for those predictable, machine-based noises.
Taming Silence with a Noise Gate
A Noise Gate is another deceptively simple yet powerful tool. It’s basically an automatic volume knob that only "opens" when the audio signal is loud enough (like when you’re speaking) and "closes" when it's quiet.
Its main job is to get rid of that low-level hiss or hum you only hear in the pauses between your words. You set a threshold, and any sound quieter than that level gets muted. This instantly cleans up the "silences" in your track, making the whole recording feel tighter and more professional.
The Ultimate Fix: Spectral Repair
For the most stubborn and isolated noises—that sudden cough, a door slam, a phone notification—you need to bring out the big guns: Spectral Repair. This advanced tool, found in software like iZotope RX or the Fairlight page in DaVinci Resolve, gives you a visual map of your audio's frequency spectrum over time.
Instead of a simple waveform, you’re looking at a spectrogram where you can literally see the unwanted sound as a visual blob or streak. You can then use a selection tool to highlight the sonic offender and tell the software to remove it, intelligently rebuilding the audio that was supposed to be there.
It’s the closest thing to using the Photoshop clone stamp tool, but for sound. It feels like magic.
AI vs. Manual Noise Reduction: Which to Use When
Deciding between a quick AI fix and a manual deep dive can be tricky. Here’s a quick breakdown to help you choose the right approach for the job.
Ultimately, there’s no single "best" method. Many pro workflows use both: an AI tool for the initial cleanup, followed by manual tweaks with an EQ or Spectral Repair to fix anything left behind.
Got Questions About Cleaning Up Your Audio? We've Got Answers.
Jumping into the world of audio cleanup can feel a little daunting. You try a new technique, run into a weird issue, and suddenly you have more questions than answers. It's totally normal. This section is all about tackling those common head-scratchers that creators run into when trying to remove background noise from video, with practical advice that actually works.
Can I Get Rid of 100% of the Background Noise?
It's the dream, right? To completely obliterate every bit of background noise. But in reality, chasing 100% silence is a trap that can do more harm than good. Modern tools are amazing, but pushing noise reduction to its absolute limit often guts your voice, leaving it sounding thin, robotic, or full of weird digital gurgles.
The real goal isn't total silence—it's effective noise reduction.
You're looking for the sweet spot where the background noise is no longer a distraction. A little bit of consistent room tone is actually more natural to the human ear than the sterile, dead void between words. It just feels more authentic.
Think of it this way: the professional approach is to aim for clarity, not a clinical vacuum. This is where AI tools like Gling’s Voice Enhancer really shine. They're trained to find that perfect balance—squashing the distractions while keeping the natural warmth and character of your voice intact.
What's the Best Free Software for Removing Background Noise?
If you're on a budget, you've got a couple of fantastic, free options that are seriously powerful, as long as you're willing to put in a little time to learn the ropes.
- DaVinci Resolve: This isn't just a video editor; it comes with the powerhouse Fairlight audio suite. You get professional-grade noise reduction, a full-blown equalizer (EQ), and gating tools, giving you complete manual control.
- Audacity: A legend in the open-source world, Audacity is a dedicated audio editor that's perfect for deep cleaning your audio. You can fix your track in Audacity and then just pop it back into your video editor to re-sync.
The catch? Both of these have a bit of a learning curve compared to one-click solutions. You'll be manually sampling noise prints and tweaking dials. For creators who value speed, a platform like Gling can be a lifesaver. Tools like its Voice Enhancer are often available on free plans and can slash your editing time.
How Can I Possibly Fix Wind Noise in My Outdoor Videos?
Ah, wind. It's the nemesis of outdoor creators. That low-frequency rumble can just swallow your dialogue whole. Honestly, the best way to fight wind is to stop it before it starts.
Getting a physical wind muff for your mic—you know, the furry thing often called a "dead cat"—is the single most effective thing you can do. It acts as a physical barrier, preventing wind from ever hitting the microphone's sensitive parts.
But if you're already back at your desk with windy footage, here’s the game plan:
- Start with a High-Pass Filter: This is your first move. A high-pass filter (or low-cut) chops out all the audio frequencies below a certain point. Start around 80-100Hz and gently slide it up until that awful rumble subsides.
- Don't Go Overboard: Be careful. If you push that filter too high, you'll start slicing into the bass of your own voice, making it sound thin. It's a delicate balance.
- Find a Specialized Tool: Some advanced audio plugins have a dedicated "De-wind" setting. If you've got one, now's the time to use it.
Why Does My Audio Sound Worse After I Try to Remove Noise?
This is the absolute worst. You apply a noise reduction effect, and instead of clear audio, you get this "watery," metallic, artifact-filled mess. It almost always boils down to one simple thing: over-processing.
When you crank up the noise reduction too high, the algorithm gets confused. It starts attacking frequencies that are actually part of your voice, and that's what creates those nasty side effects.
To avoid this, just remember the golden rule: less is more.
- Start low and go slow. Apply a subtle amount of reduction and increase it gradually until the noise is just less distracting. It doesn't need to vanish.
- Use good headphones. Constantly A/B test the effect—toggle it on and off. Is the improvement in noise worth the hit to your vocal quality?
- Often, a reduction of just 10-15 dB is all you need to push the noise into the background where it belongs, without mangling your voice.
Intelligent AI enhancers are built to be smarter about this, but even they have their limits. At the end of the day, you have to trust your ears.
Ready to transform your editing workflow and get crystal-clear audio in just a few clicks? Gling uses powerful AI to automatically remove silences, bad takes, and background noise, turning hours of tedious editing into minutes.